How to Draw a Lock Step by Step
Sometimes, your property may be in situations where it is in danger of being stolen or broken into.
This is an unfortunate situation to be in, but luckily there are measures one can take to ensure that this property is kept nice and safe.
A padlock is a simple device but it is very effective at keeping belongings secure and inaccessible.
They can come in many different shapes and sizes, and despite the simplicity of their design it can be tricky to learn how to draw a padlock.
That's why this tutorial is here, however, as it will show you how to easily draw one of these handy devices!
We hope that you enjoy unlocking the secrets of this drawing in our step-by-step guide on how to draw a padlock in 6 steps!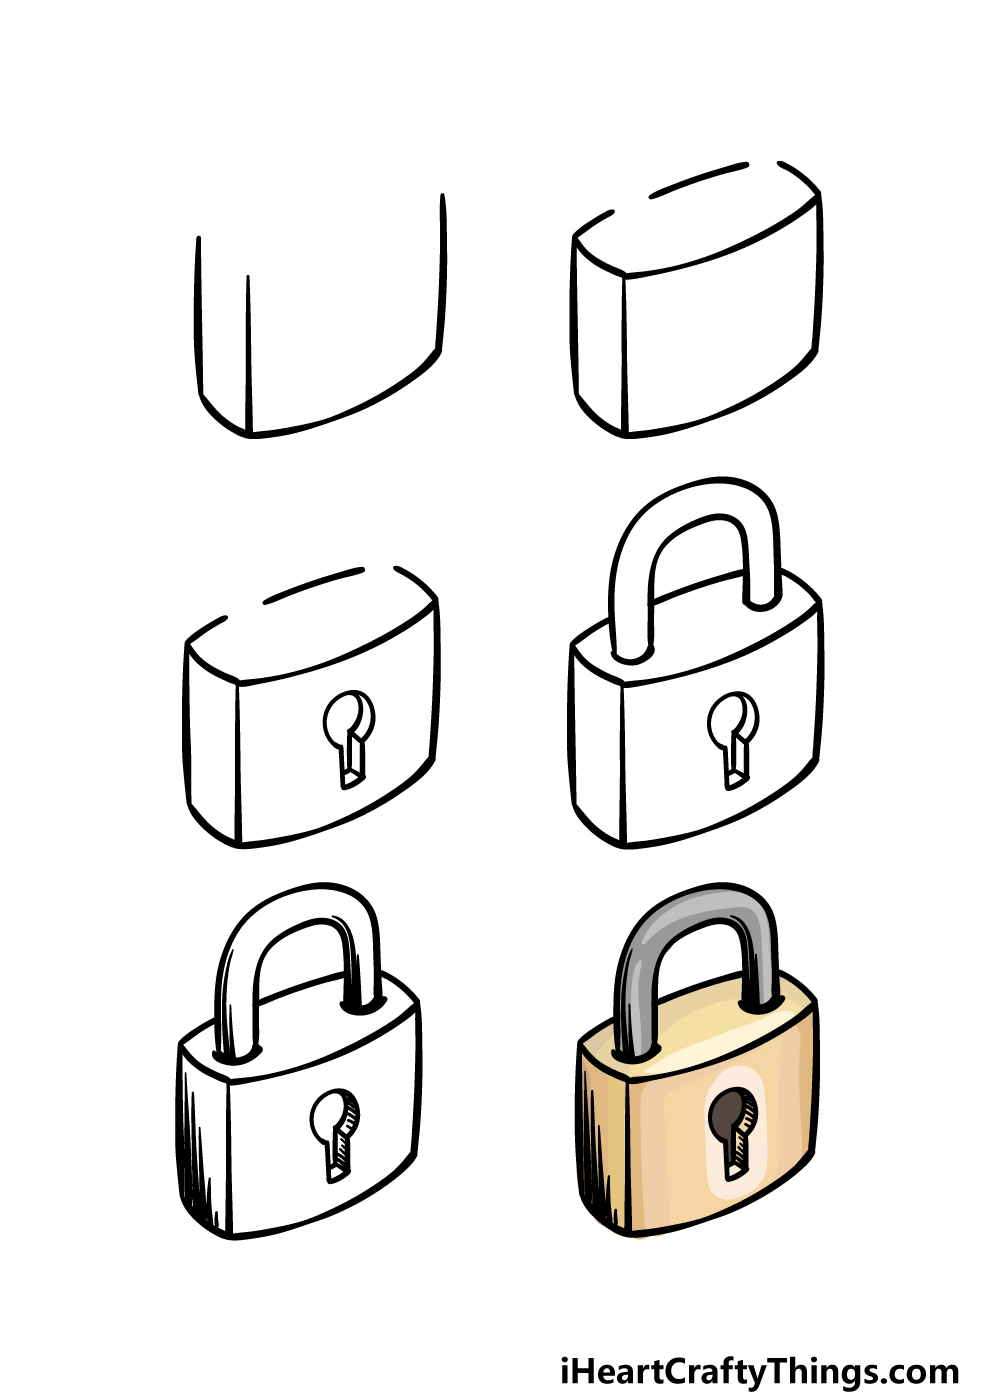
What's in this Blog Post
- How to Draw A Padlock – Let's Get Started!
- Step 1
- Step 2 – Draw the top edge of the padlock
- Step 3 – Now, draw the keyhole of the padlock
- Step 4 – Next, draw the bar of the padlock
- Step 5 – Add the final details to your padlock drawing
- Step 6 – Finish off your padlock drawing with color
- Your Padlock Drawing is Complete!
How to Draw A Padlock – Let's Get Started!
Step 1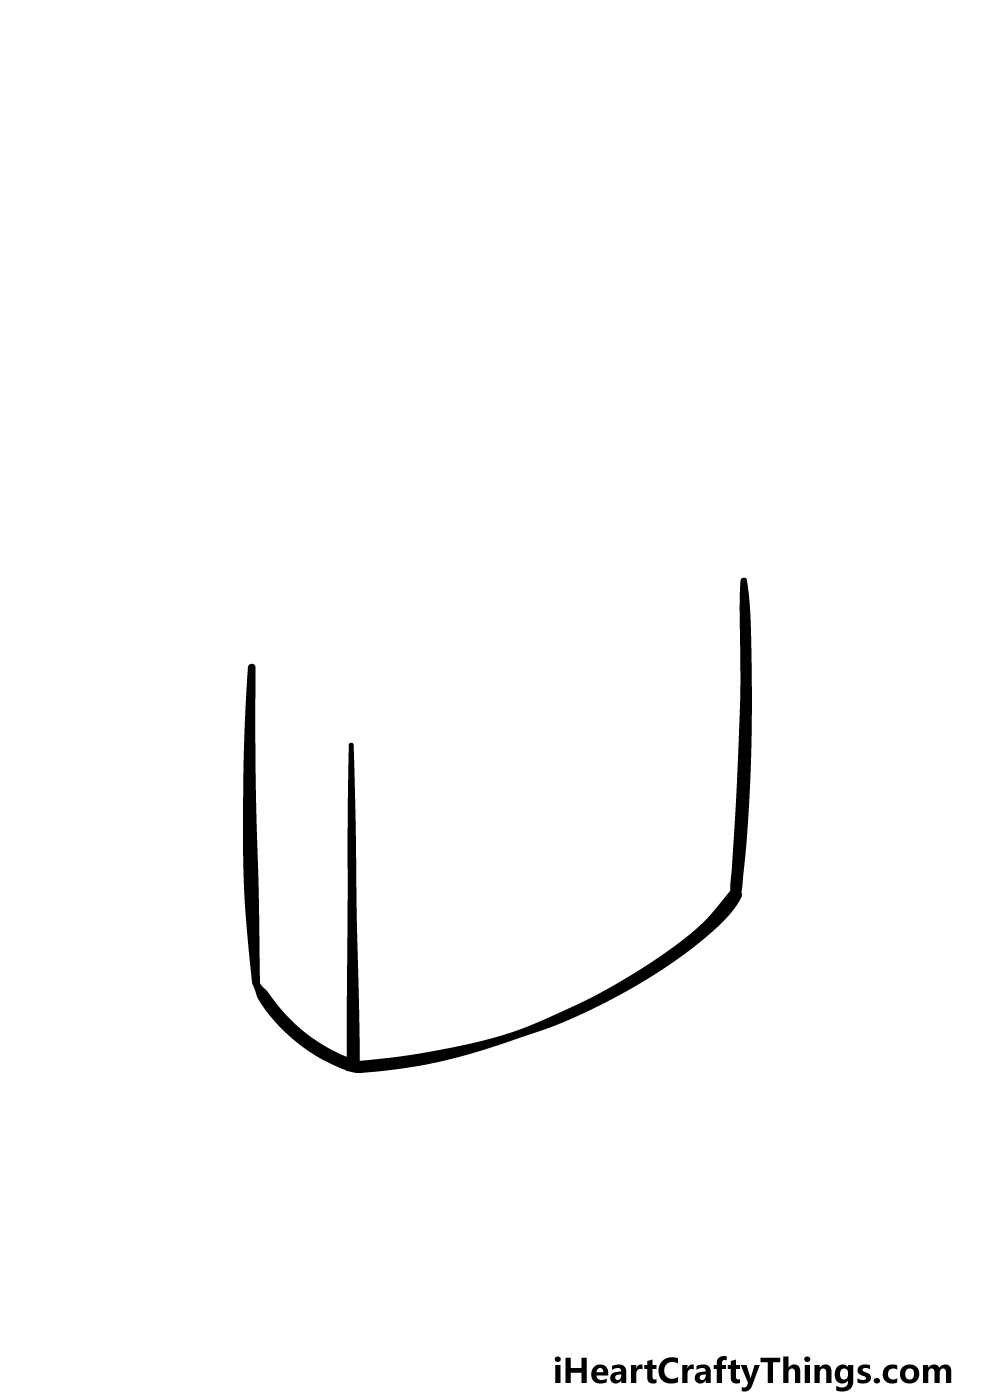
To get started with this guide on how to draw a padlock, we will begin by drawing the main part of the padlock.
When drawing this main part of the padlock, try to keep the dimensions this rectangular object would have if you were holding it in your hands.
Use two vertical lines close to each other for the thin side of the padlock, and then use a slightly curved horizontal one for the base.
Finish off by drawing another slightly curved vertical line for the other side of the padlock. The top of it will be blank for now, but we will fill that blank in shortly!
Step 2 – Draw the top edge of the padlock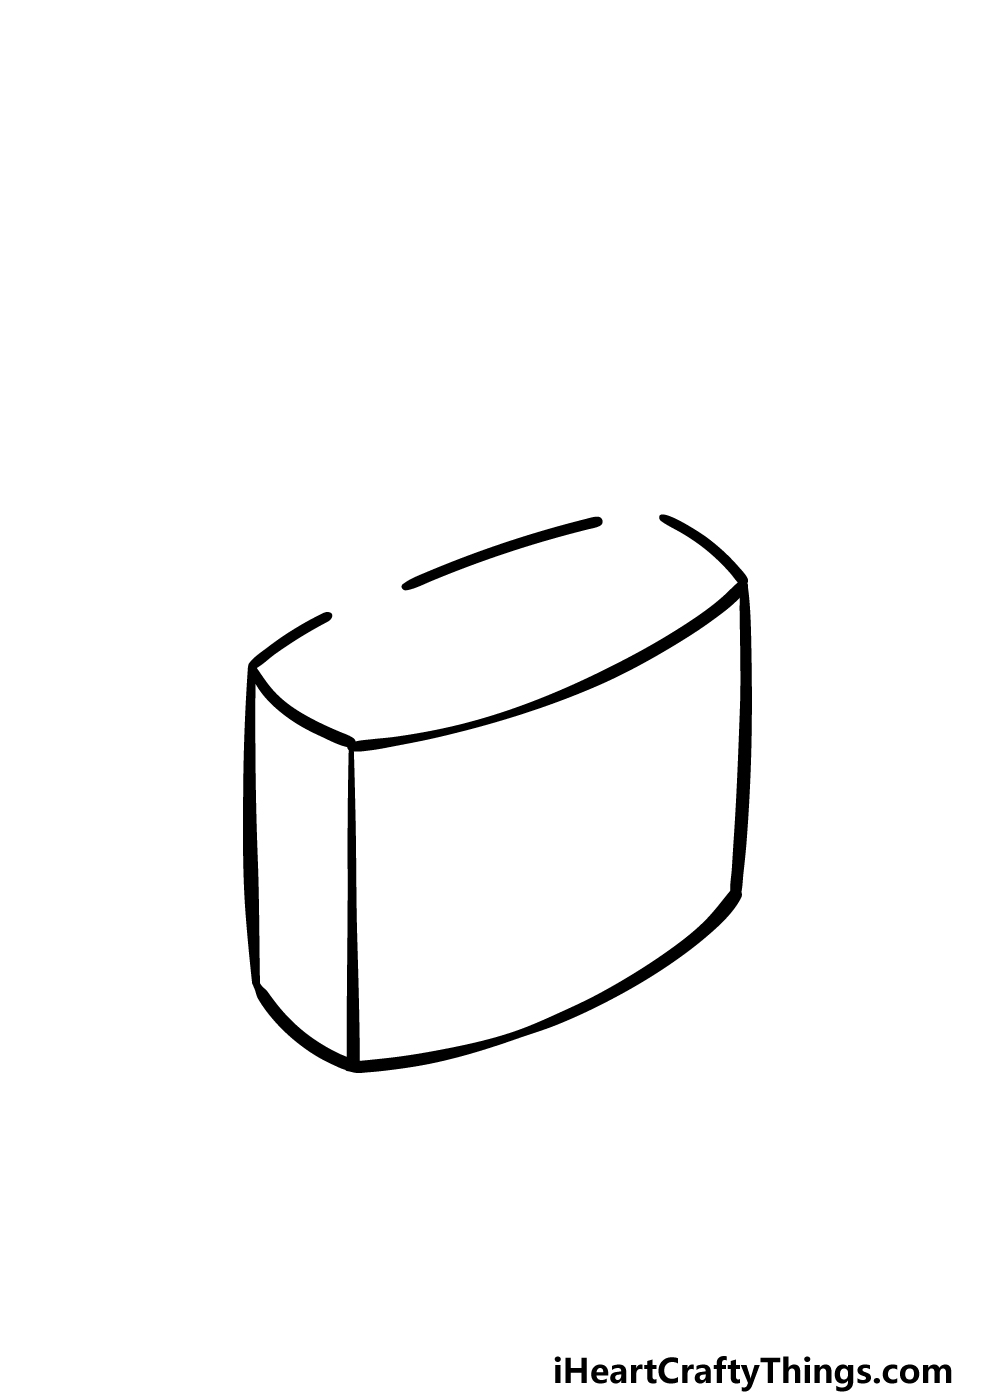
This second part of your padlock drawing will see you filling in those blanks that were left in the previous step.
You will be drawing the top edge of the padlock in this step, and once again you will be using some slightly curved lines to connect all of the previous edges of the padlock
As you draw, make sure that you leave two fairly small spaces at the top. The reference image will guide you as to how these should be positioned, and these will have the metal bar of the padlock going through them later.
With this portion of the lock drawn, you are now ready for step 3.
Step 3 – Now, draw the keyhole of the padlock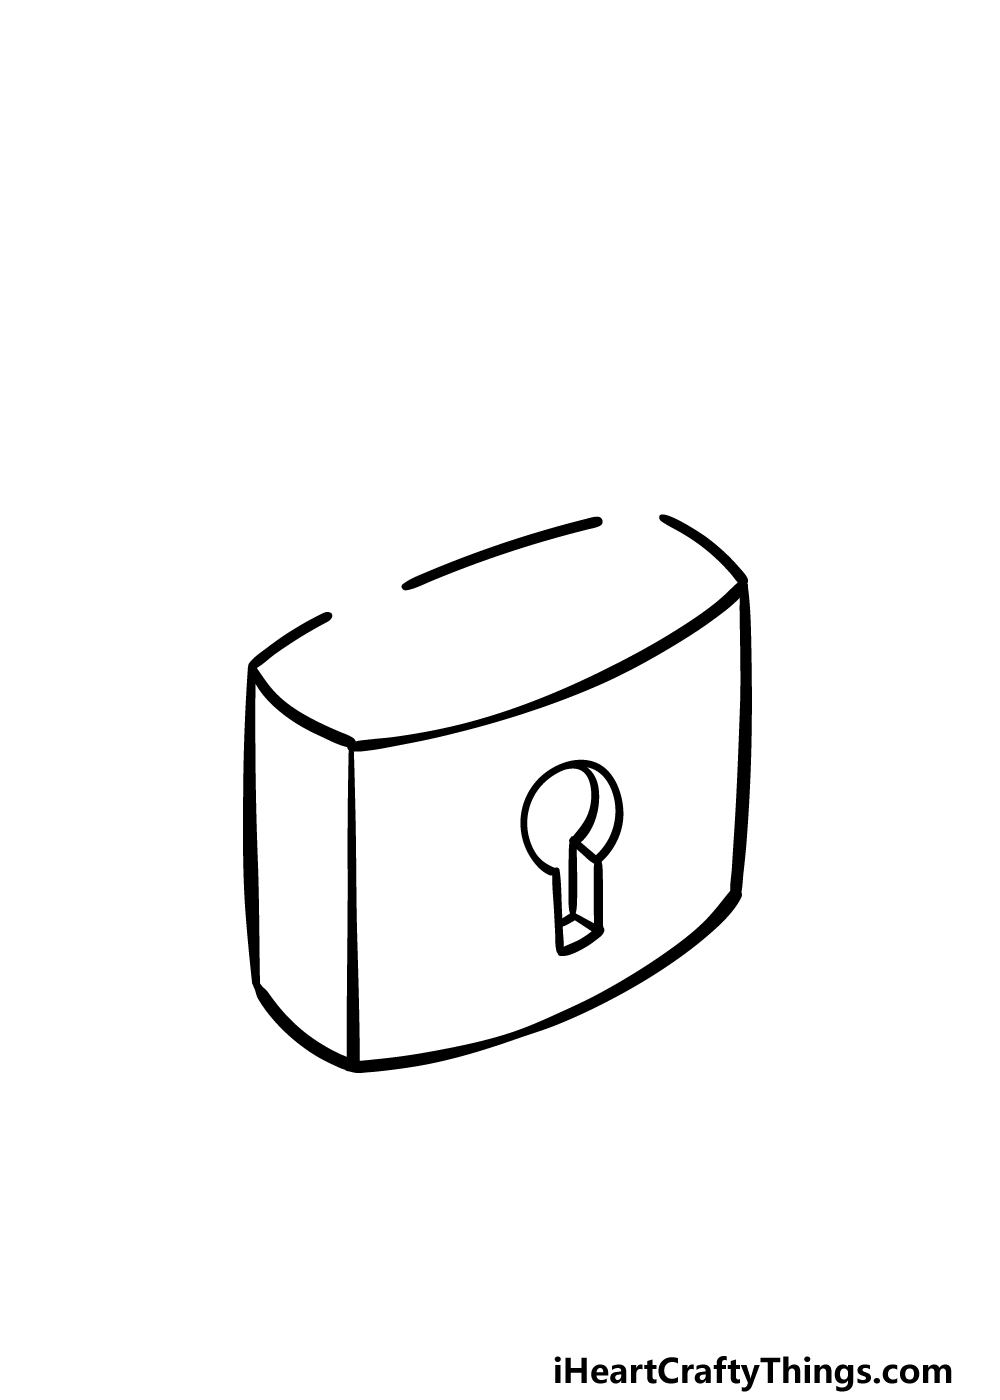
Without a keyhole, a padlock would be a pretty useless object, as it would lock the owner out of their property as well as potential intruders!
That's why we had better add a keyhole in this step of our guide on how to draw a padlock.
The placement of keyholes can vary depending on the make of the padlock, but this one will be on the front of it.
The keyhole will have a round top to it, and then it will have a rectangular portion below. Add some more lines to the interior to give this keyhole some depth, and then we can move on.
Step 4 – Next, draw the bar of the padlock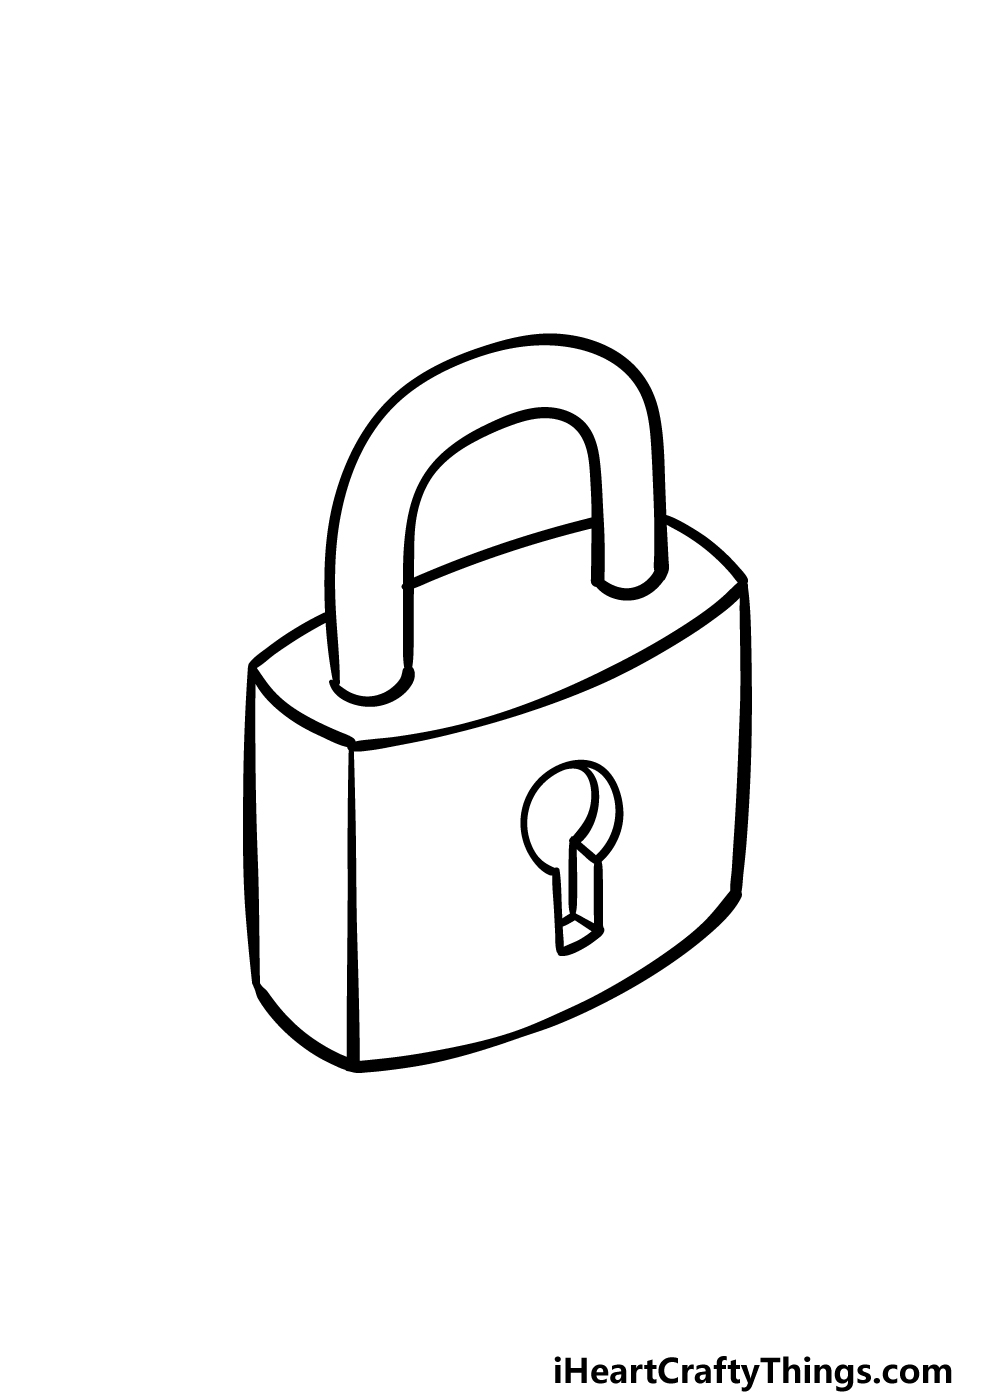
Another important feature of any padlock is the metal bar that extends from it. We shall be drawing this aspect for this part of your padlock drawing.
In this step, you will also be filling in those gaps that were left at the top of the padlock in an earlier step.
When drawing this bar, the smoother you can get it, the better. There's also quite a specific shape to it, so try your best to take it slowly and replicate the lines as they appear in our reference image.
Once the bar is drawn, you can then move on to some final details in the next step!
Step 5 – Add the final details to your padlock drawing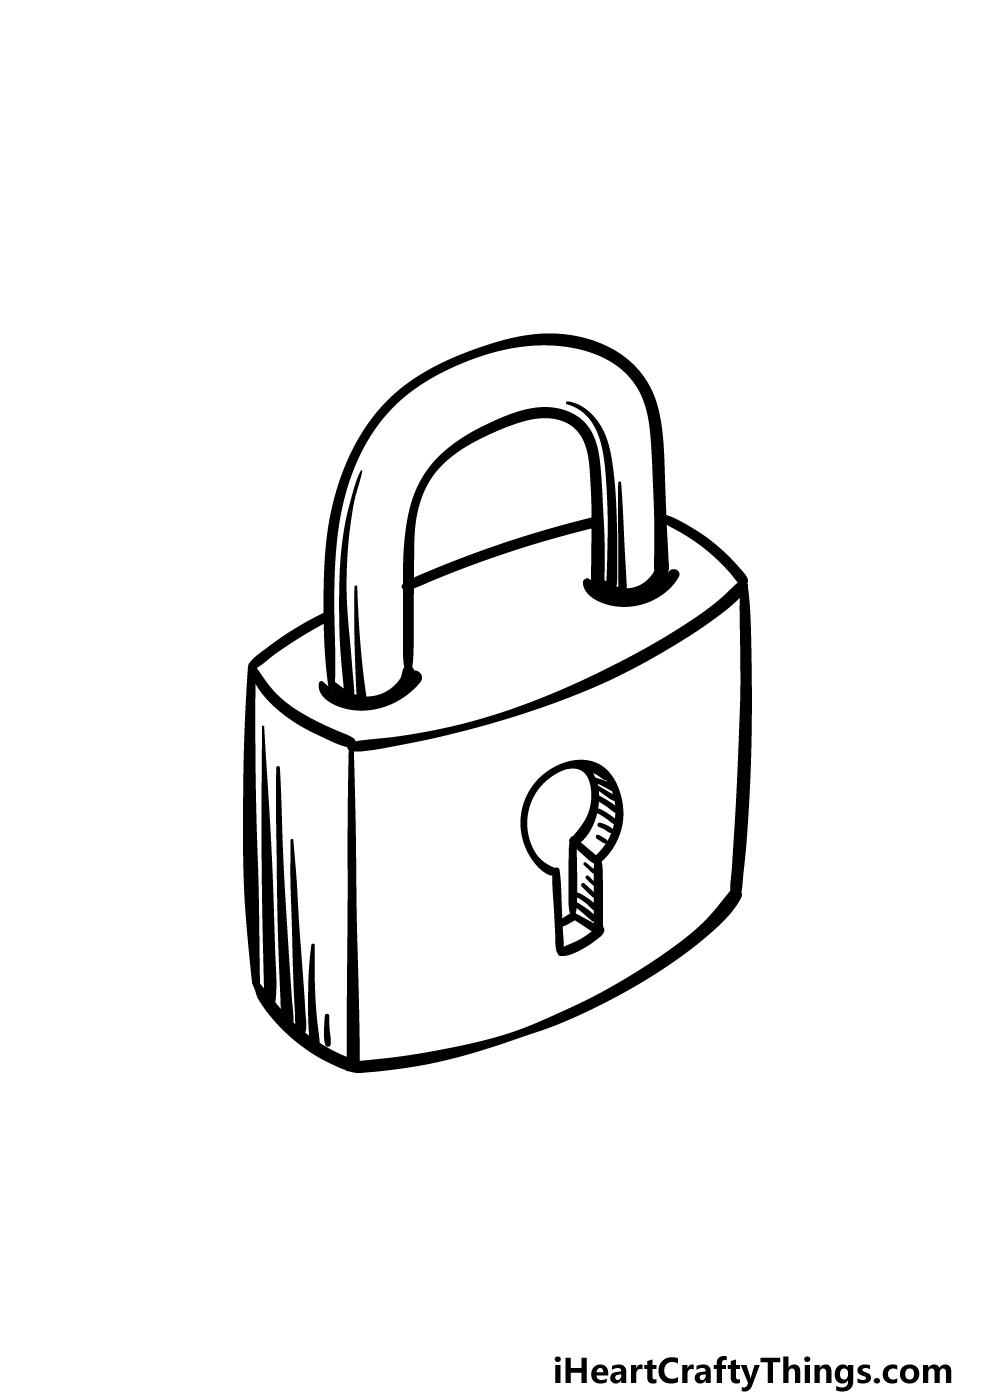
Now you're ready to add some final touches in this fifth step of our guide on how to draw a padlock!
The entire outline of the padlock is complete at this stage, so now we shall be adding extra details for more realism.
To do this, we will be adding some thick, fairly straight lines onto various sides of the padlock to create some shading details. You can add more of these shading details if you prefer as well!
Before you move on to the final step of the guide, you could also draw some extra details. What do you think this padlock would be securing?
You could show us some of your ideas by drawing a background for this image. It would be very interesting to see what you would use this padlock on!
Step 6 – Finish off your padlock drawing with color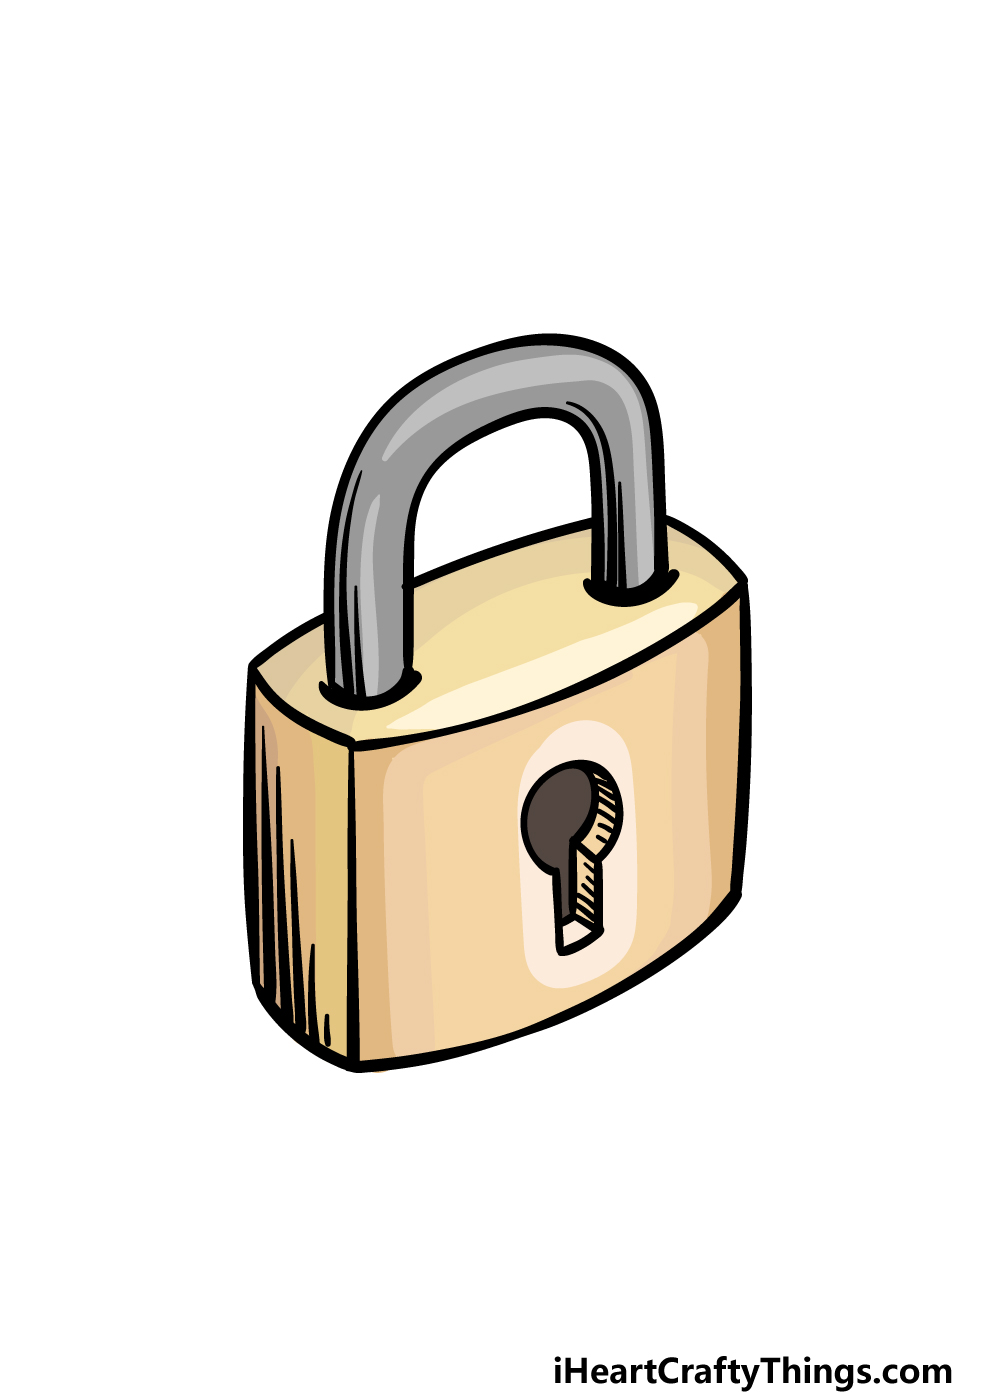
This is the final step of your padlock drawing, and in it you can finish off by adding some colors to the image.
In our reference image, we used some shades of gold and yellows for the main body of the padlock.
This helps to give that section a look of being made of shiny bronze. For the bar, we used some greys to make it appear more metallic.
These are the colors that we chose, but there are many more colors you could also use!
If you're going for a metallic look as well, you could even glue a light sprinkling of gold or silver glitter onto it to make the metal look a bit shiny. What colors and art mediums will you use to finish it off?
Your Padlock Drawing is Complete!
Even when an object looks simple, it can still prove surprisingly difficult to draw accurately. We had this in mind as we designed this guide on how to draw a padlock.
This is why we broke it down into smaller and more manageable steps so that you could see that it can be easier than expected too!
Now that you've finished the guide, you can keep it going by adding your own details as well.
We mentioned how you could draw a background or add some creative color choices as a few ideas, but what else can you think of to finish it off?
Then, you should be sure to head on to our website for more awesome drawing guides! We not only have a huge collection but intend to add many more soon. You'll definitely want to keep checking in!
Please also be sure to share your finished padlock drawing on our Facebook and Pinterest pages, as this is the best way to show off your creative efforts!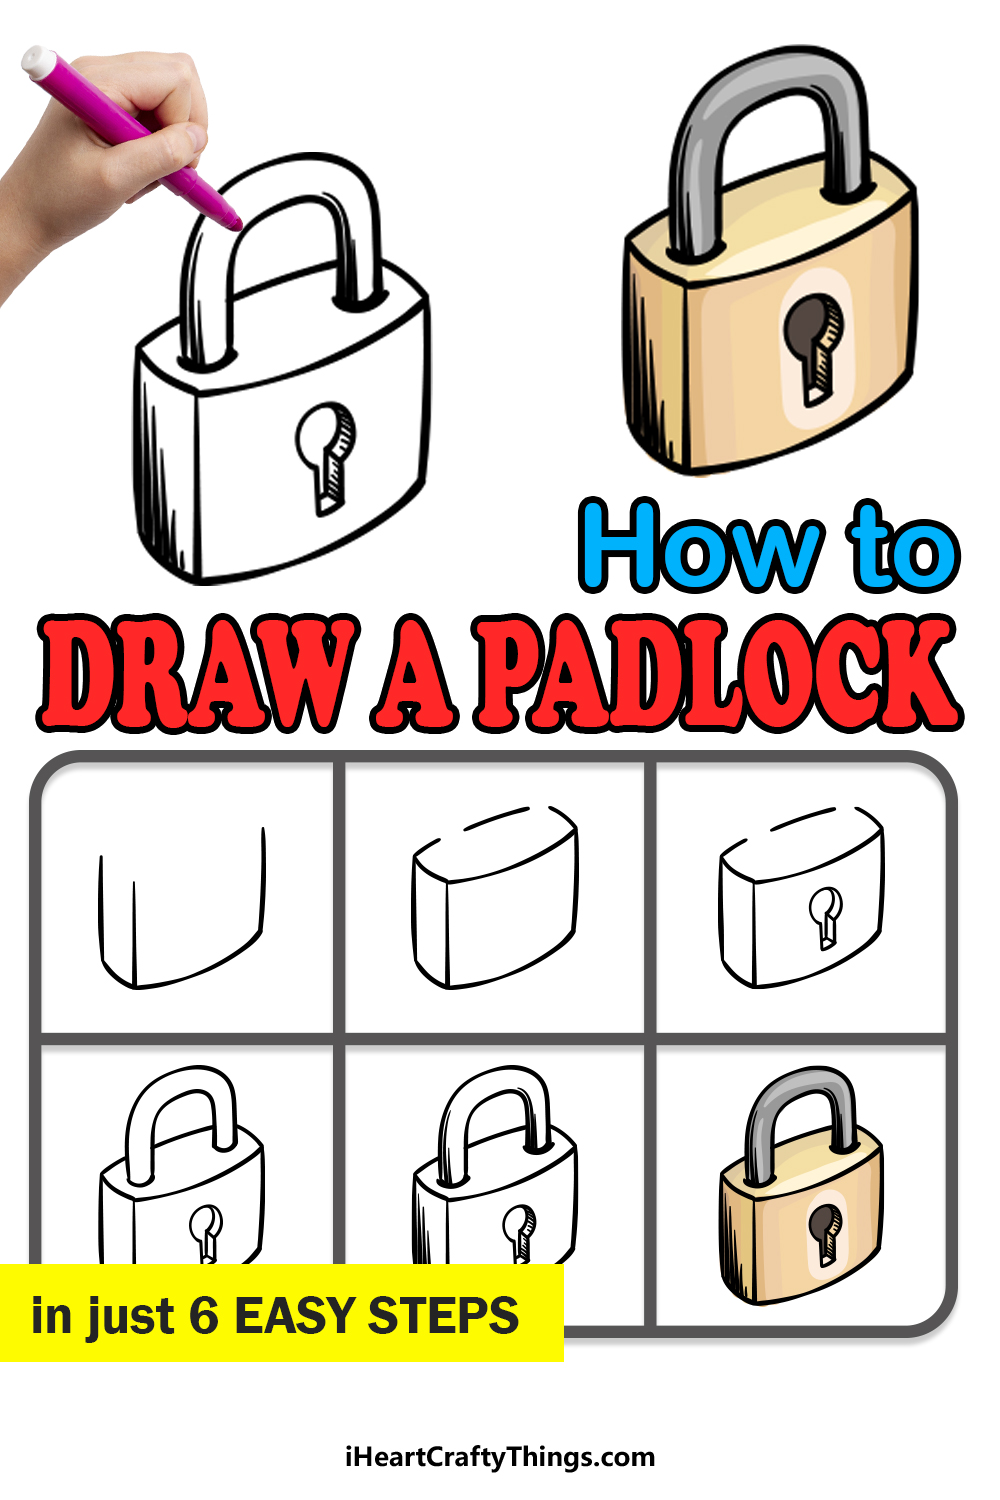
How to Draw a Lock Step by Step
Source: https://iheartcraftythings.com/padlock-drawing.html
0 Response to "How to Draw a Lock Step by Step"
ارسال یک نظر